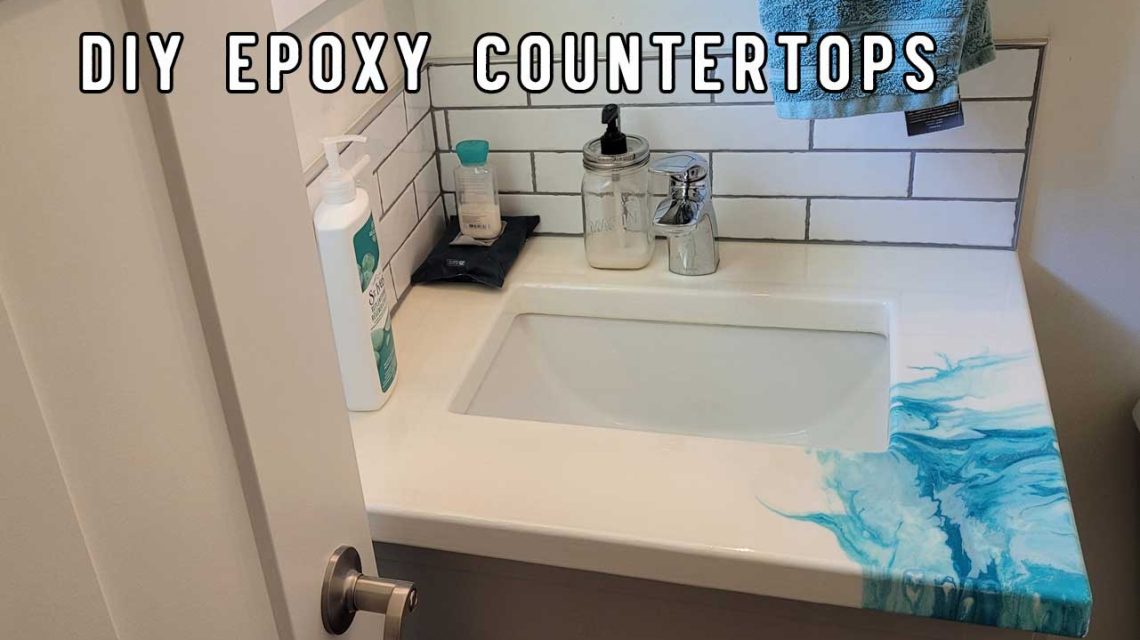
Are you ready to finally take the plunge and make some INCREDIBLE DIYs epoxy countertops or resin worktops?
If so, you’ve come to the right place!
Before I made my own, I thought it would be a really difficult process. But it wasn’t.
With a little planning you can make your own amazing countertops at a fraction of the price.
The Cost of Resin Countertops DIY
 When I priced out the cost of getting 3 bathroom vanity countertops done in Quartz, it was close to $3000!!
So that was out.
Then I thought about doing them in concrete. But that would be incredibly heavy to move and I was worried they might crack during the moving process. I didn’t want to pour them in place because it would be super messy. And I didn’t want to go the GFRC route to reduce weight because by the time I had everything priced out it pretty expensive, and I didn’t want to have to seal it every year.
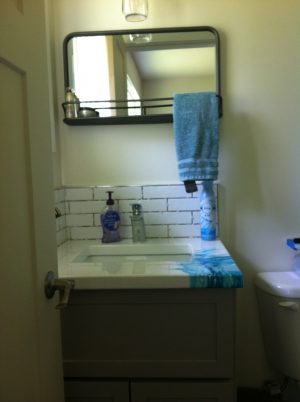
I wanted to avoid laminate countertops so I could use an undermount sink as I think it really adds a nice design element to the room.
The solution? Some a resin countertop DIY project!
By the time I got the resin, wood and primer, I figure I’m into this project for about $500. And I’ll have enough material to do 3-4 vanity countertops.
I think the first 2 turned out pretty well. And we’ve had a lot of compliments on them so far, so I think I’m ok to say that the DIY Epoxy Countertops project was a success.
What You’ll Need for DIY Epoxy Countertops
 So, here is my basic list of supplies that you’ll need for the epoxy countertops. You probably already have most of the things listed below, but if not I’ve included links to them on Amazon if you need to buy them.
And as I’m a member of the Amazon affiliate program, if you purchase anything through these links I might make a small commission from it.
Oh and for me, I use the terms worktop & countertop interchangeably as you can use epoxy resin to make a counter surface for virtually any application. Workbench, bathroom vanity, kitchen countertops, laundry room countertop and so on.
Epoxy Resin Worktop Tools & Supply List
- Tape Measure
- Saw
- Zero Clearance Jig. This is completely optional. I made my own to ensure precise cuts for the countertops, but if you’ve got a steady hand you can probably just mark and cut it. If you don’t, you may want to consider getting a jig or asking the hardware store to cut your plywood to size for you.
- Small Router. I found this little tool to be really helpful for making a small radius around the inside sink edges and the outside edges of the counter. This was important because I wanted to use an undermount sink. If you aren’t using an undermount sink, you can probably get away with just sanding the outside edges of the countertop so they aren’t sharp.
- 1/8″-1/4″ Roundover bit for the router.
- Screws
- Primer
- Spray paint. For coloring your countertop and adding effects as needed.
- Clear Mixing containers. Make sure that the ones you use have the measurements shown on the outside of the container.
- Paint brushes
- Hand held propane torch. This is important. You will need this in order to bring some heat to the epoxy to help remove some of the bubbles so you get a clear finish.
- Epoxy. You will need enough epoxy to do 2 coats, so make sure you measure your countertop and then check the coverage of the epoxy you’re wanting to buy. Typically each coat is 1/8″ or so – you don’t want it much thicker.
- Drill
- Mixing Paddle
- Saw Horses or some other surface that you can elevate your countertop on.
- Plastic to catch all of the drips. Epoxy is cool stuff but it’s really sticky and will harden into an almost impossible to remove product once its dry. So be sure to section off your working area to drips don’t land where you don’t want them.
- Nitrile Gloves. These keep your hands from becoming a sticky mess.
- 3/4″ MDF Plywood. The amount will depend on how big a worktop you need to make.
- Sink. I used this undermount sink, but you can use something else if you’d like.
- Sink Faucet. I used the Zarina faucet by Moen and I love the look of it.
- Glue for the wood. I use this instabond stuff and it’s amazing.
- Jigsaw. You’ll need this for cutting the sink hole.
- Palm Sander. You might be able to just use sandpaper, but I found the palm sander to be a lot faster.
- Holesaw for cutting the hole for the faucet. You may have to drill 1 or 3 holes depending on the faucet style you use.
- Paint stir sticks.
- Square notched trowel
- Isopropyl Alcohol. Optional, depending on the style and effects you want to create.
- Spray Bottle. Only required if you end up using the isopropyl alcohol.
So that’s the list. Some of this stuff is one time use only like the plastic, the mixing containers, & stir sticks.
Step 1 – Planning
This is the most important step and the biggest part of having a successful DIY Epoxy Countertops project.
So take your time and make a list of what you’ll need, and measure the size, orientation & sink location (if applicable) of the countertop you need to build.
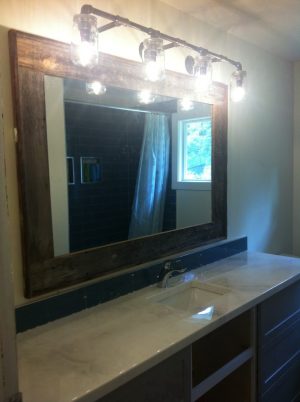
Now is a good time to decide if you’re going to make matching backsplashes as well, or if you’re going to do something else. (I ended up tiling the backsplash.)
Once you have your overall measurements taken, you will need to determine what size of hole(s) you need to make for the sink and the faucet.
If you’re re-using your existing sink and faucet, then you can just copy what you already have.
If you aren’t, you’ll need to account for the clearance needed between your backsplash and faucet, and the faucet location in reference to the sink.
On top of this, you’ll have to measure and make sure that your sink placement will fit inside your existing vanity.
I made my own vanity (you can see the process I took in the DIY Storage Cabinet project here) so I had to make sure that I located my sink in a spot where it was not only centered on the countertop, but where the sink had enough room to be installed inside the vanity itself!
So 1) determine your countertop style and design, 2) order or get your faucet and sink, 3) take your measurements and then order your supplies as needed.
Step 2 – MDF Cuttin’ Time
Once you have your measurements, you can go and buy your 3/4″ MDF plywood.
I recommend using MDF as it has an even, smooth surface and it’s straight and flat. Plywood can be uneven or warp a little.
I wanted thick countertops, so I used 2 sheets of the 3/4″ MDF to get the overall height up to 1.5″ thick.
When making a small countertop, I simply stacked one sheet on top of the other.
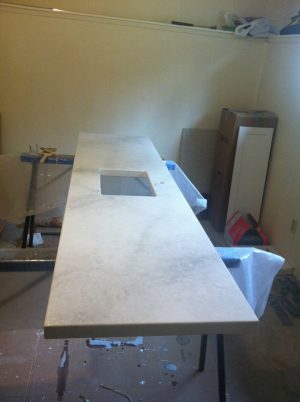
For the larger countertop, I cut strips about 3″ wide and put them all around the edges and then one large one where I was going to cut the hole for the sink.
By doing this, I didn’t have all the extra weight of 2 big pieces of MDF that I’d have to lug up the stairs when it came to install it. MDF is dense and is a lot heavier than just a standard sheet of 3/4″ plywood.
So you’ve officially been warned.
Once you have your MDF, you can layout your countertop.
If you’re stacking 2 pieces of MDF together, I recommend gluing and screwing them together first and then cutting the countertop to size. Screw the bottom onto the top piece. This ensures that you won’t have any screw holes in the top of your countertop.
Make sure that you don’t mix up your top and bottom pieces when you do this as it could cause problems with fitment later on.
TIP: Use a drill bit and drill a hole in each of the 4 corners where you want to locate your sink. Use a bit large enough that you can insert the jigsaw blade inside of the hole.
This serves 2 purposes: 1 – the hole will give you a nice corner radius &, 2 – you will have a much easier time starting the jigsaw cut for your sink hole.
Once you’ve got your sink hole cut, you can cut the hole for the faucet.
You can see from the picture above just how you can lay out your countertop.
When everything is cut to size and you’ve got your holes in, you can use the palm sander to even out any rough edges.
Then use the small router with a 1/4″ roundover bit and give all the edges (other than the hole for the faucet) a nice little radius.
Just set the depth of the router and make sure you use a bit with a bearing on the top of it to guide it. If you aren’t sure about how to do this, test the process on a scrap piece of wood first.
Step 3 – It’s Preppin’ Time!
Now that you’ve got your countertop made, give it a light sand with some sandpaper. We should do this to ensure we have good adhesion of the primer to the MDF.
Then wipe off all the dust and give it a coat of primer.
When the primer is dry, give it another light sand and wipe before giving it a second coat of primer.
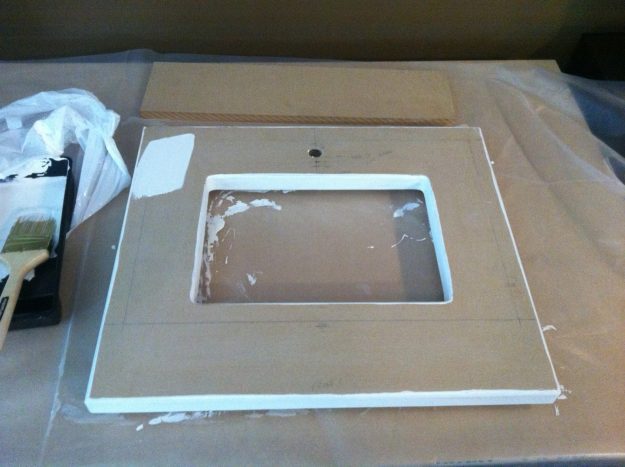
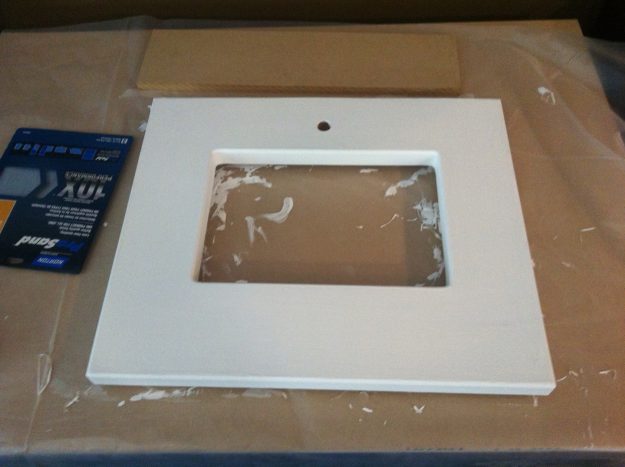
I used a pretty standard white primer and made white countertops. You could also use a contrasting colored primer if you want to see where you might have missed a spot in your epoxy coverage.
But using white turned out fine for me.
At this point we’re ready for epoxy, so make sure you’ve got what you need and that your work area is protected as needed.
Step 4 – Epoxy
Now, if you’ve never used epoxy before I would recommend trying it out on a scrap piece of MDF first to get a feel for how it works.
I didn’t do a test piece before I made my small vanity, but I did a few different samples before I did the large vanity.
If you do a couple of samples, use scraps and give them at least 1 coat of primer before doing the epoxy.
Once you’re ready to do your test piece or countertop, get your supplies together and make sure you’ve got a large area covered with plastic.
Give yourself a little extra workspace around your project – it will make life much easier.
Also, I found it helpful to raise the countertops up off of the saw horses using scrap plywood. This will let you to get at the underside edge of the countertop so you can deal with the drips as your resin countertops dry.
Try to level your countertops as best you can and use a level if needed.
Mine weren’t perfectly level but they still turned out fine.
If your countertops aren’t level, your effects will move and change as gravity pulls the epoxy around a little.
Personally I loved this and felt it really added a natural, organic look to the project to the DIY epoxy countertops.
At this point with your work area ready, your supplies gathered and your countertop made, you’re ready to start right after you glove up.
Once you’ve done that, grab your disposable measuring buckets and pour out the hardener into your mixing bucket. Do not use an old bucket – get new cheap buckets and throw them out after you’re done the project.
These products come as a 2 parts – a hardener and the epoxy itself. I found that it was easier to mix when I added the hardener first. So read the instructions and figure out how much of each you will need to use to produce one coat.
Then pour the hardener and epoxy into the bucket according to the ratio in the product directions and start stirring. Depending on what type of resin you use, the manufacturer may recommend stirring it manually or using a drill.
I was able to use a drill with a special mixing bit and then mixed it for a couple of minutes. Make sure you get down into the bottom edges of the mixing container so everything’s mixed properly.
After doing that, the epoxy was a little cloudy and had bubbles in it. This doesn’t matter as the bubbles will be removed later.
This batch will be your base coat.
I wanted a white base coat so I added a little white paint right into the mixing bucket of epoxy and stirred it up. I used Rustoleum spray paint and it worked really well.
Tip: The more paint you add, the less translucent the epoxy becomes. So if you add just a little, you will have just a slight tinge of color in your epoxy and you’ll be able to see through to the primer. If you add more, you’ll be seeing just a flat color.
To test where you’re at, stick a paint stick into the mixture and pull it out on a 45 degree angle to see if you’re able to see through the epoxy to the stick underneath or not.
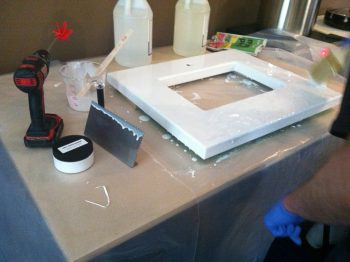
Once you’re happy with the amount of color in your epoxy, pour your epoxy out onto the middle of your sample or countertop, keeping it away from the edges.
For the countertops, I poured a long rectangular strip of epoxy right down the middle of the countertop.
Now grab your notched trowel and begin lightly scraping the epoxy back and forth in a left to right and then up and down, gradually pushing everything closer to the edges.
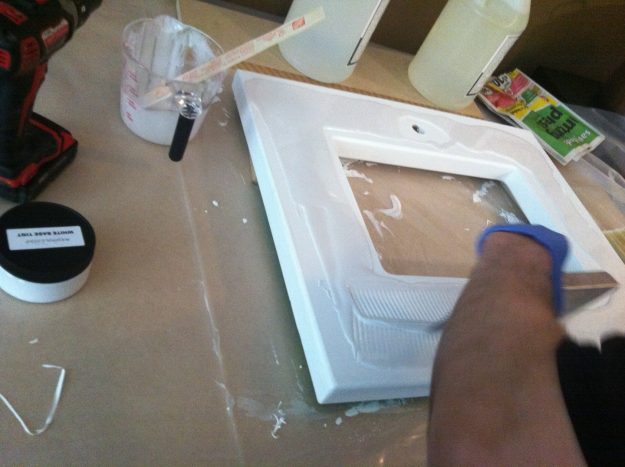
This helps mix the epoxy and releases a few air bubbles.
Gradually work the epoxy back and forth and before long, the epoxy will start to settle out and will flow over the edges a bit.
As this starts to happen, grab a paintbrush (removing any loose bristles first) and paint these drips horizontally along the face of the countertop edge to even out the coverage.
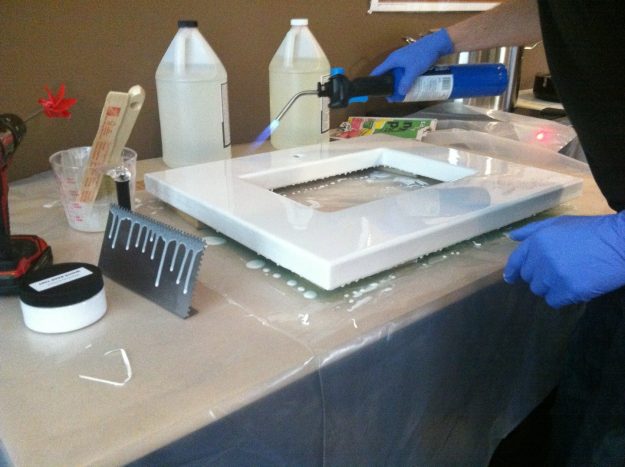
After that, you can fire up the little propane torch and lightly add some heat to the epoxy to release the bubbles. Make sure to keep the flame moving over the countertop (don’t stop in one place) and you’ll see little bubbles come to the surface and pop. This will give you a nice smooth surface.
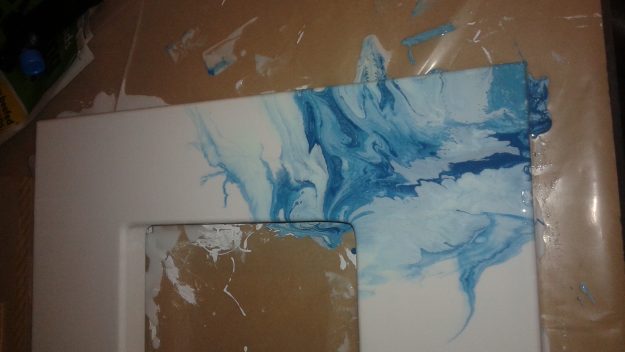
Now it’s time to add some artistic flair if you want.
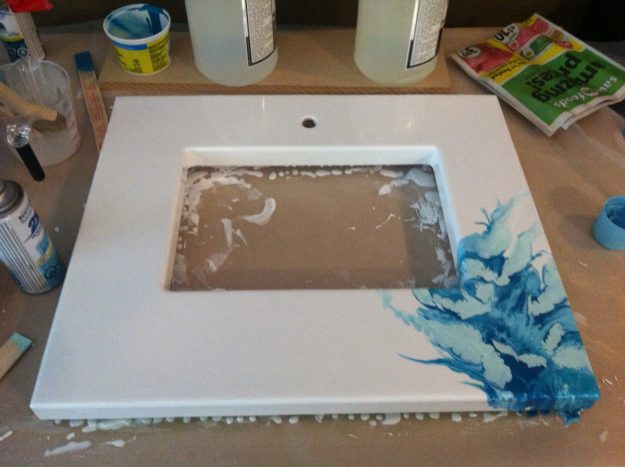
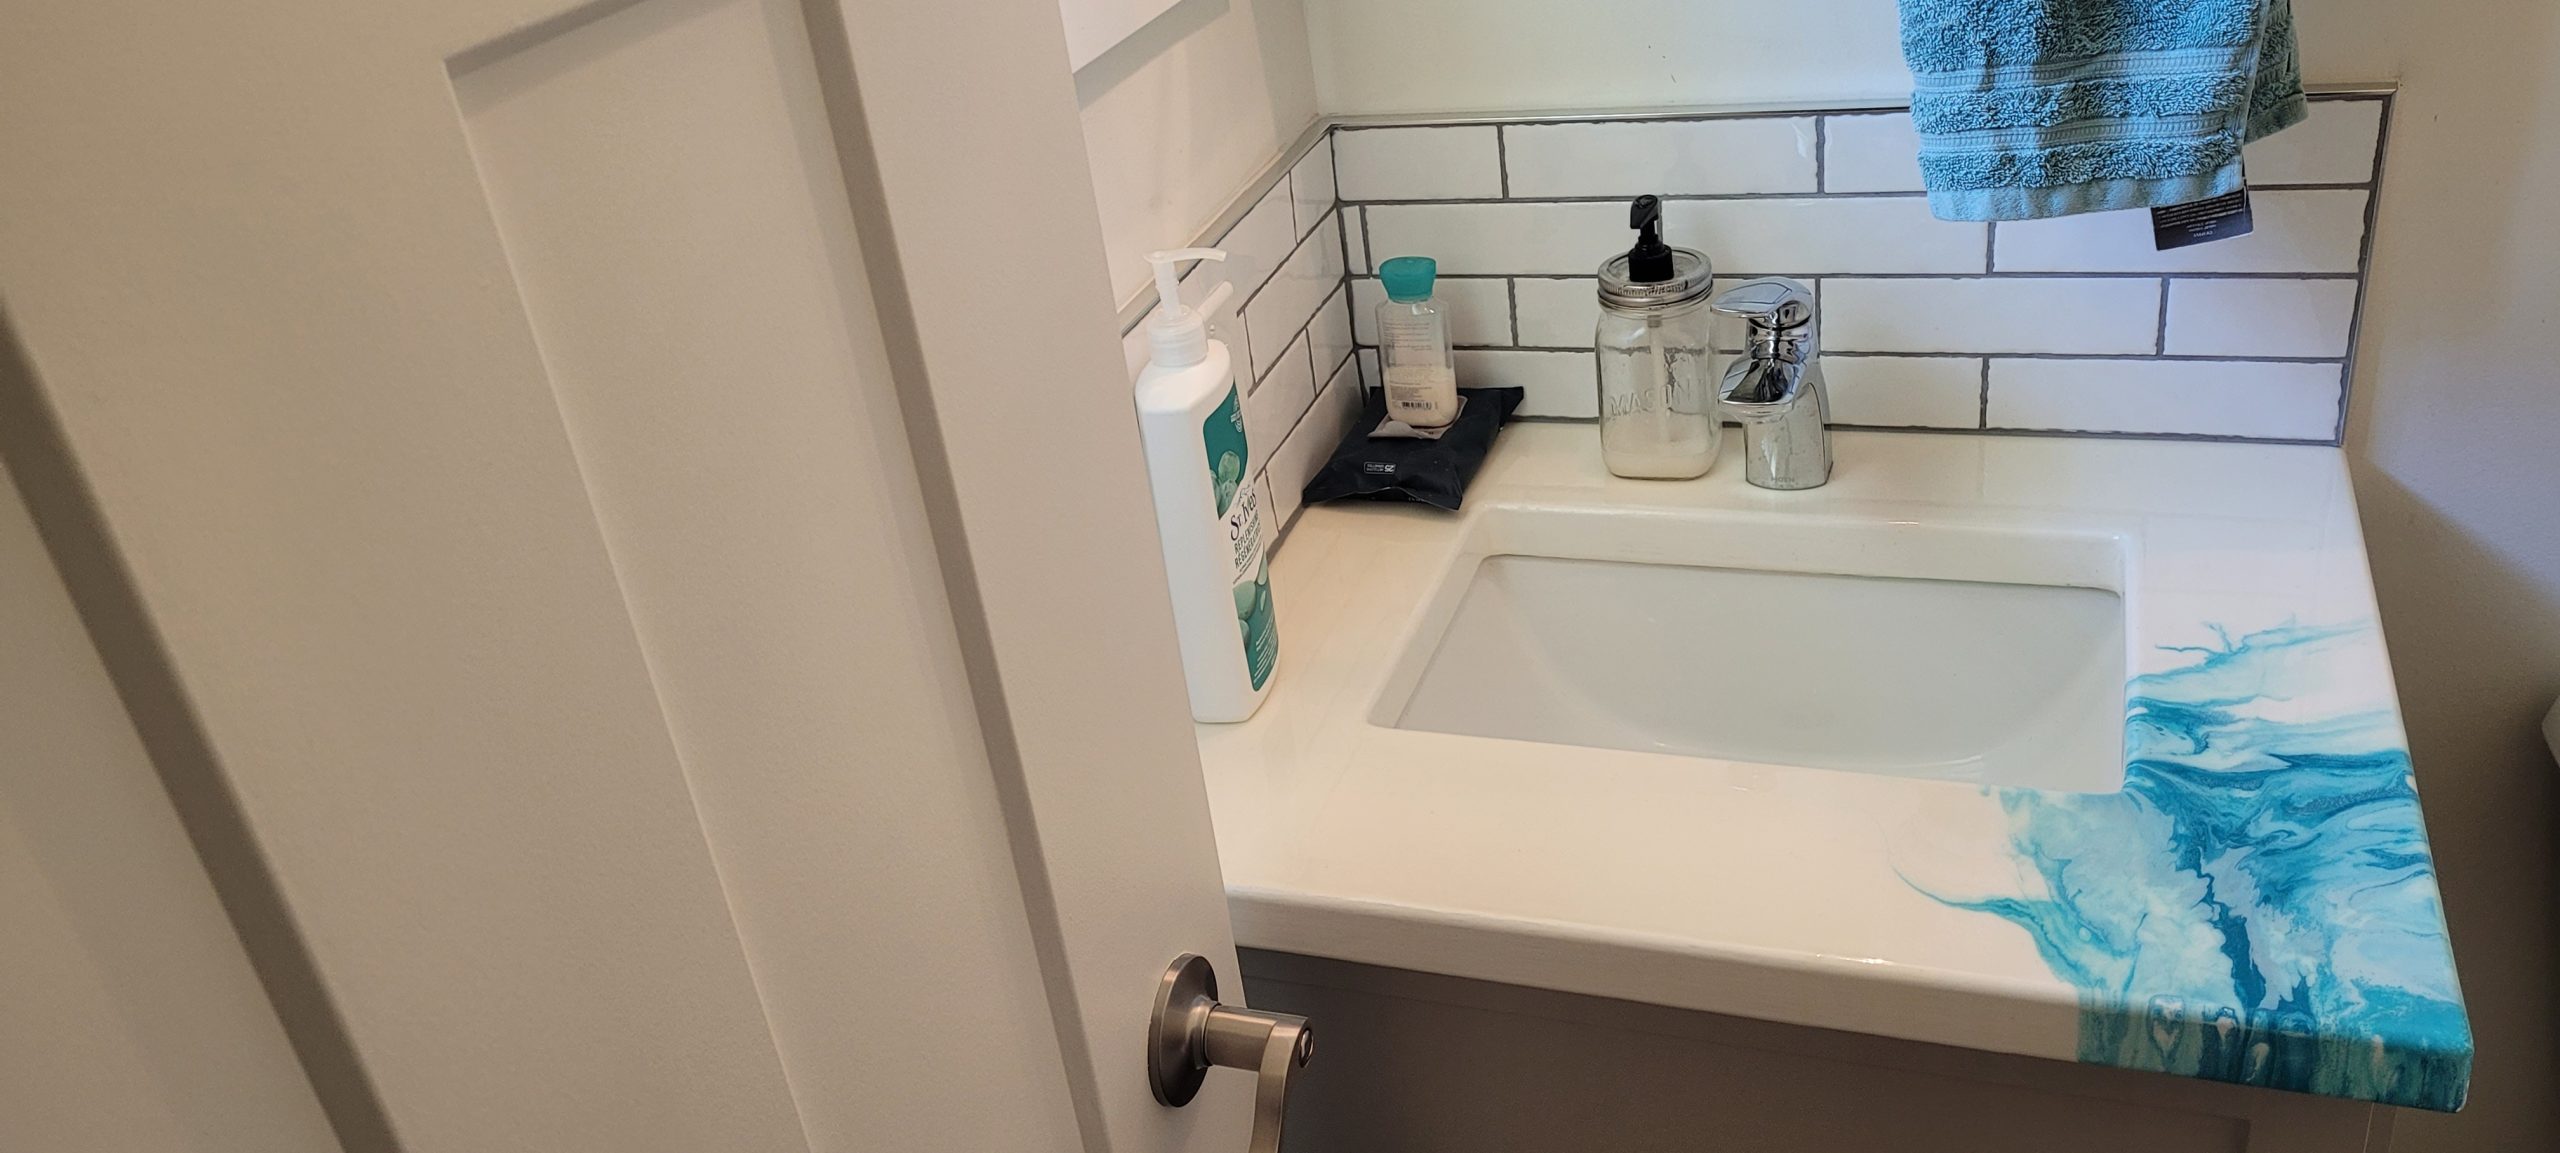
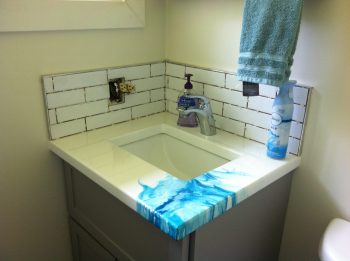
For the blue countertop, I grabbed a new paint stir stick for each color I wanted to add and just sprayed some spray paint onto one end of it. Then I took the stick at a 45 degree angle or so and dragged the edge with the paint into and through the white epoxy base coat according to the rough paint effect I was after.
I then repeated the process for the other colors I wanted to use.
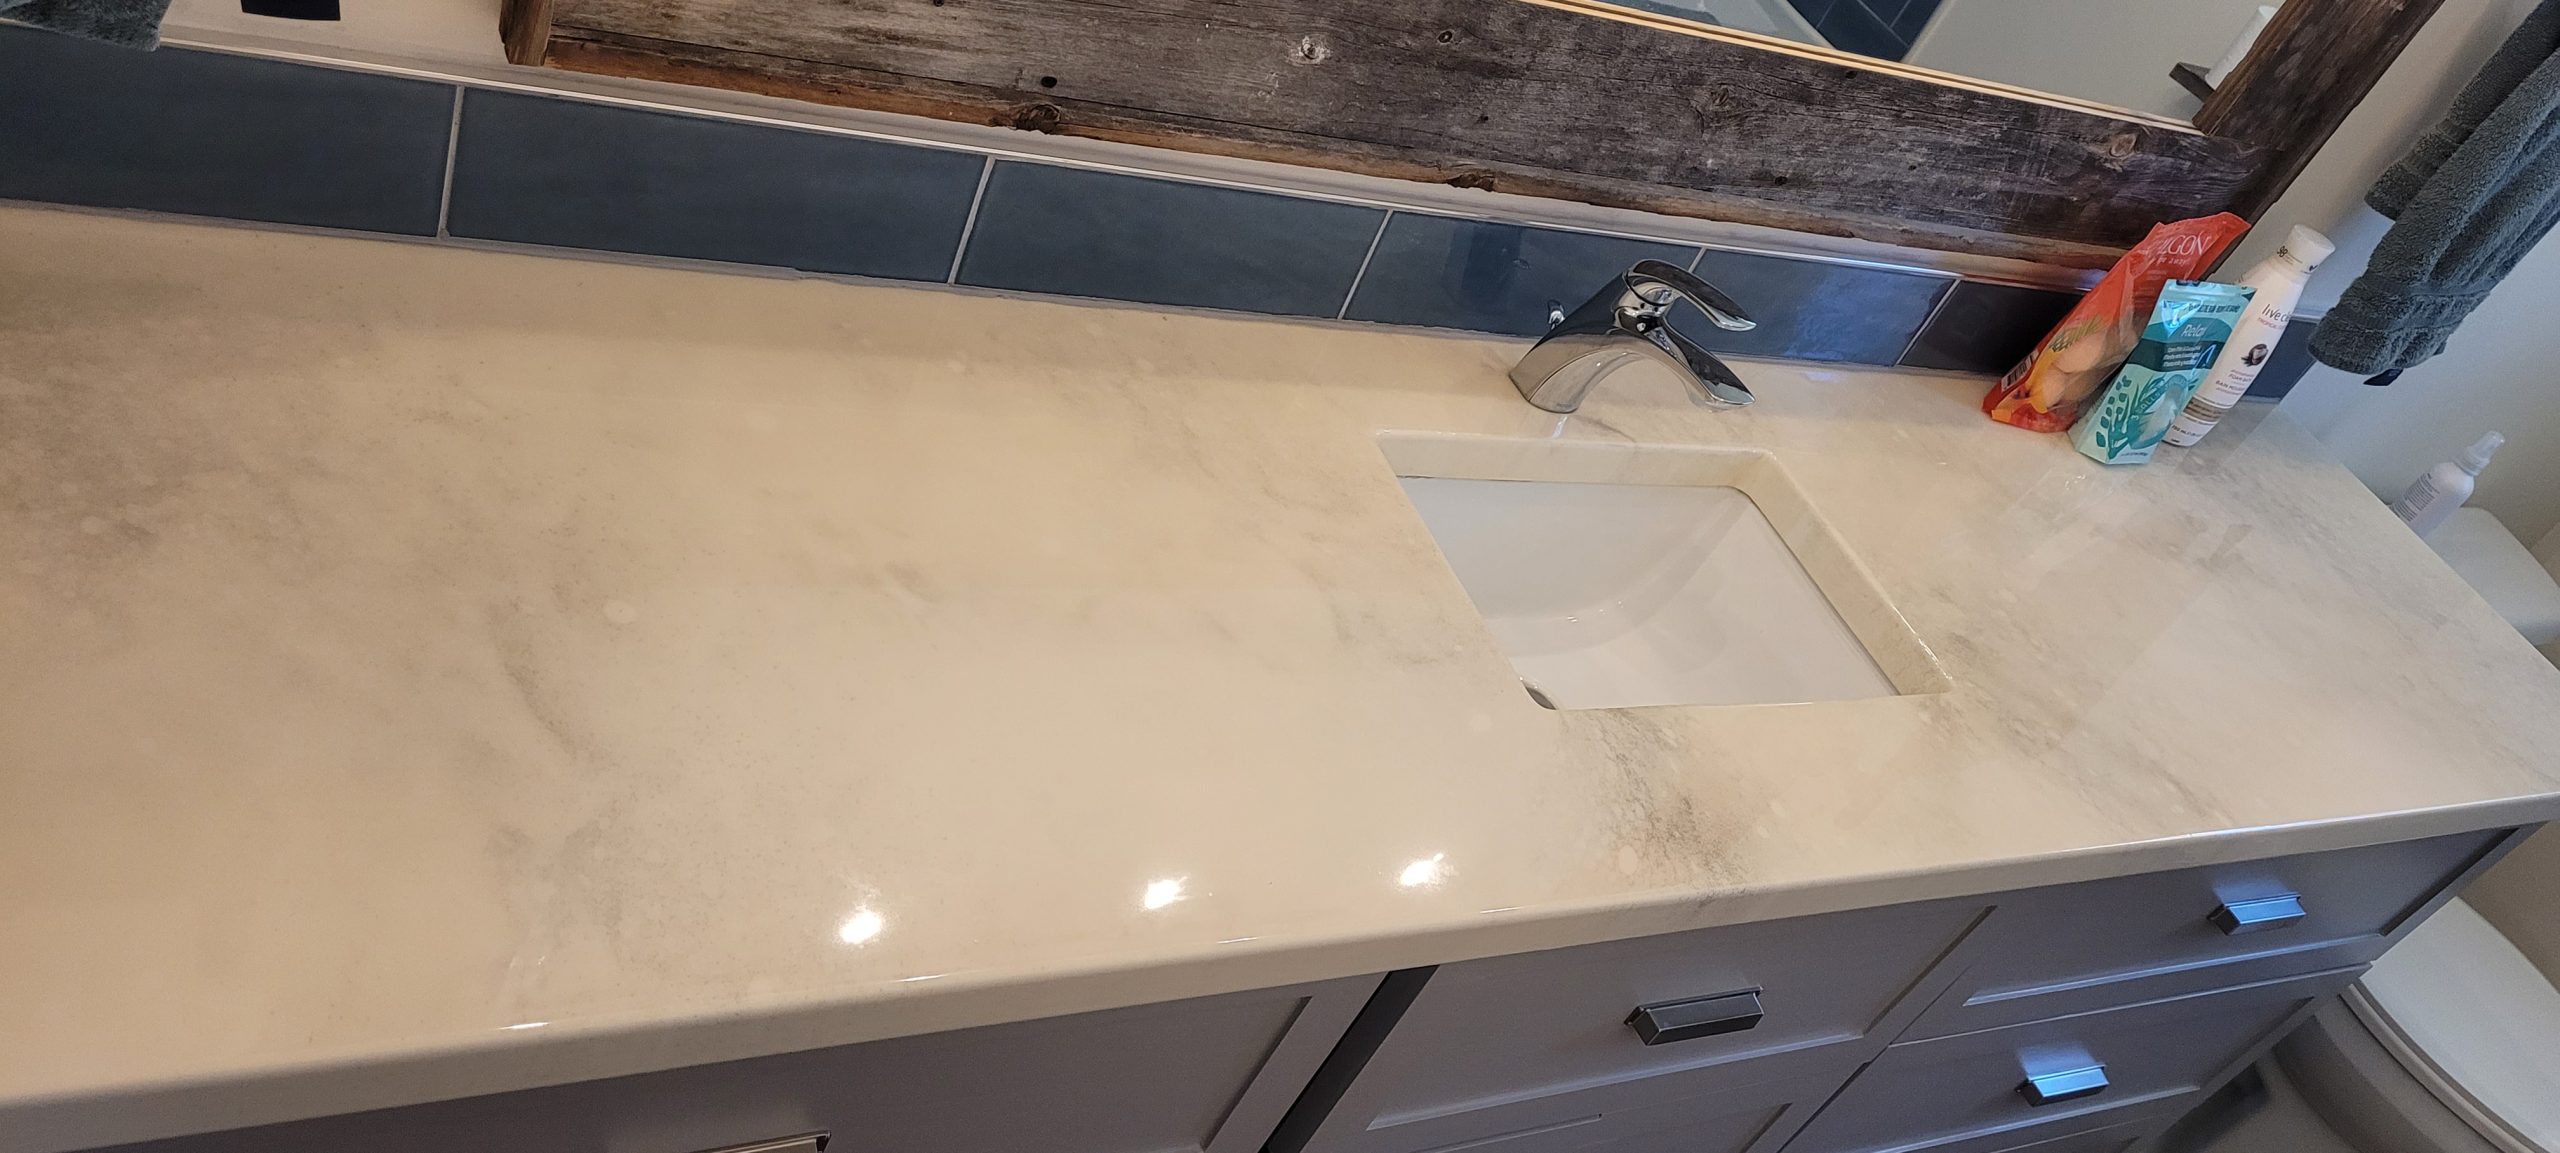
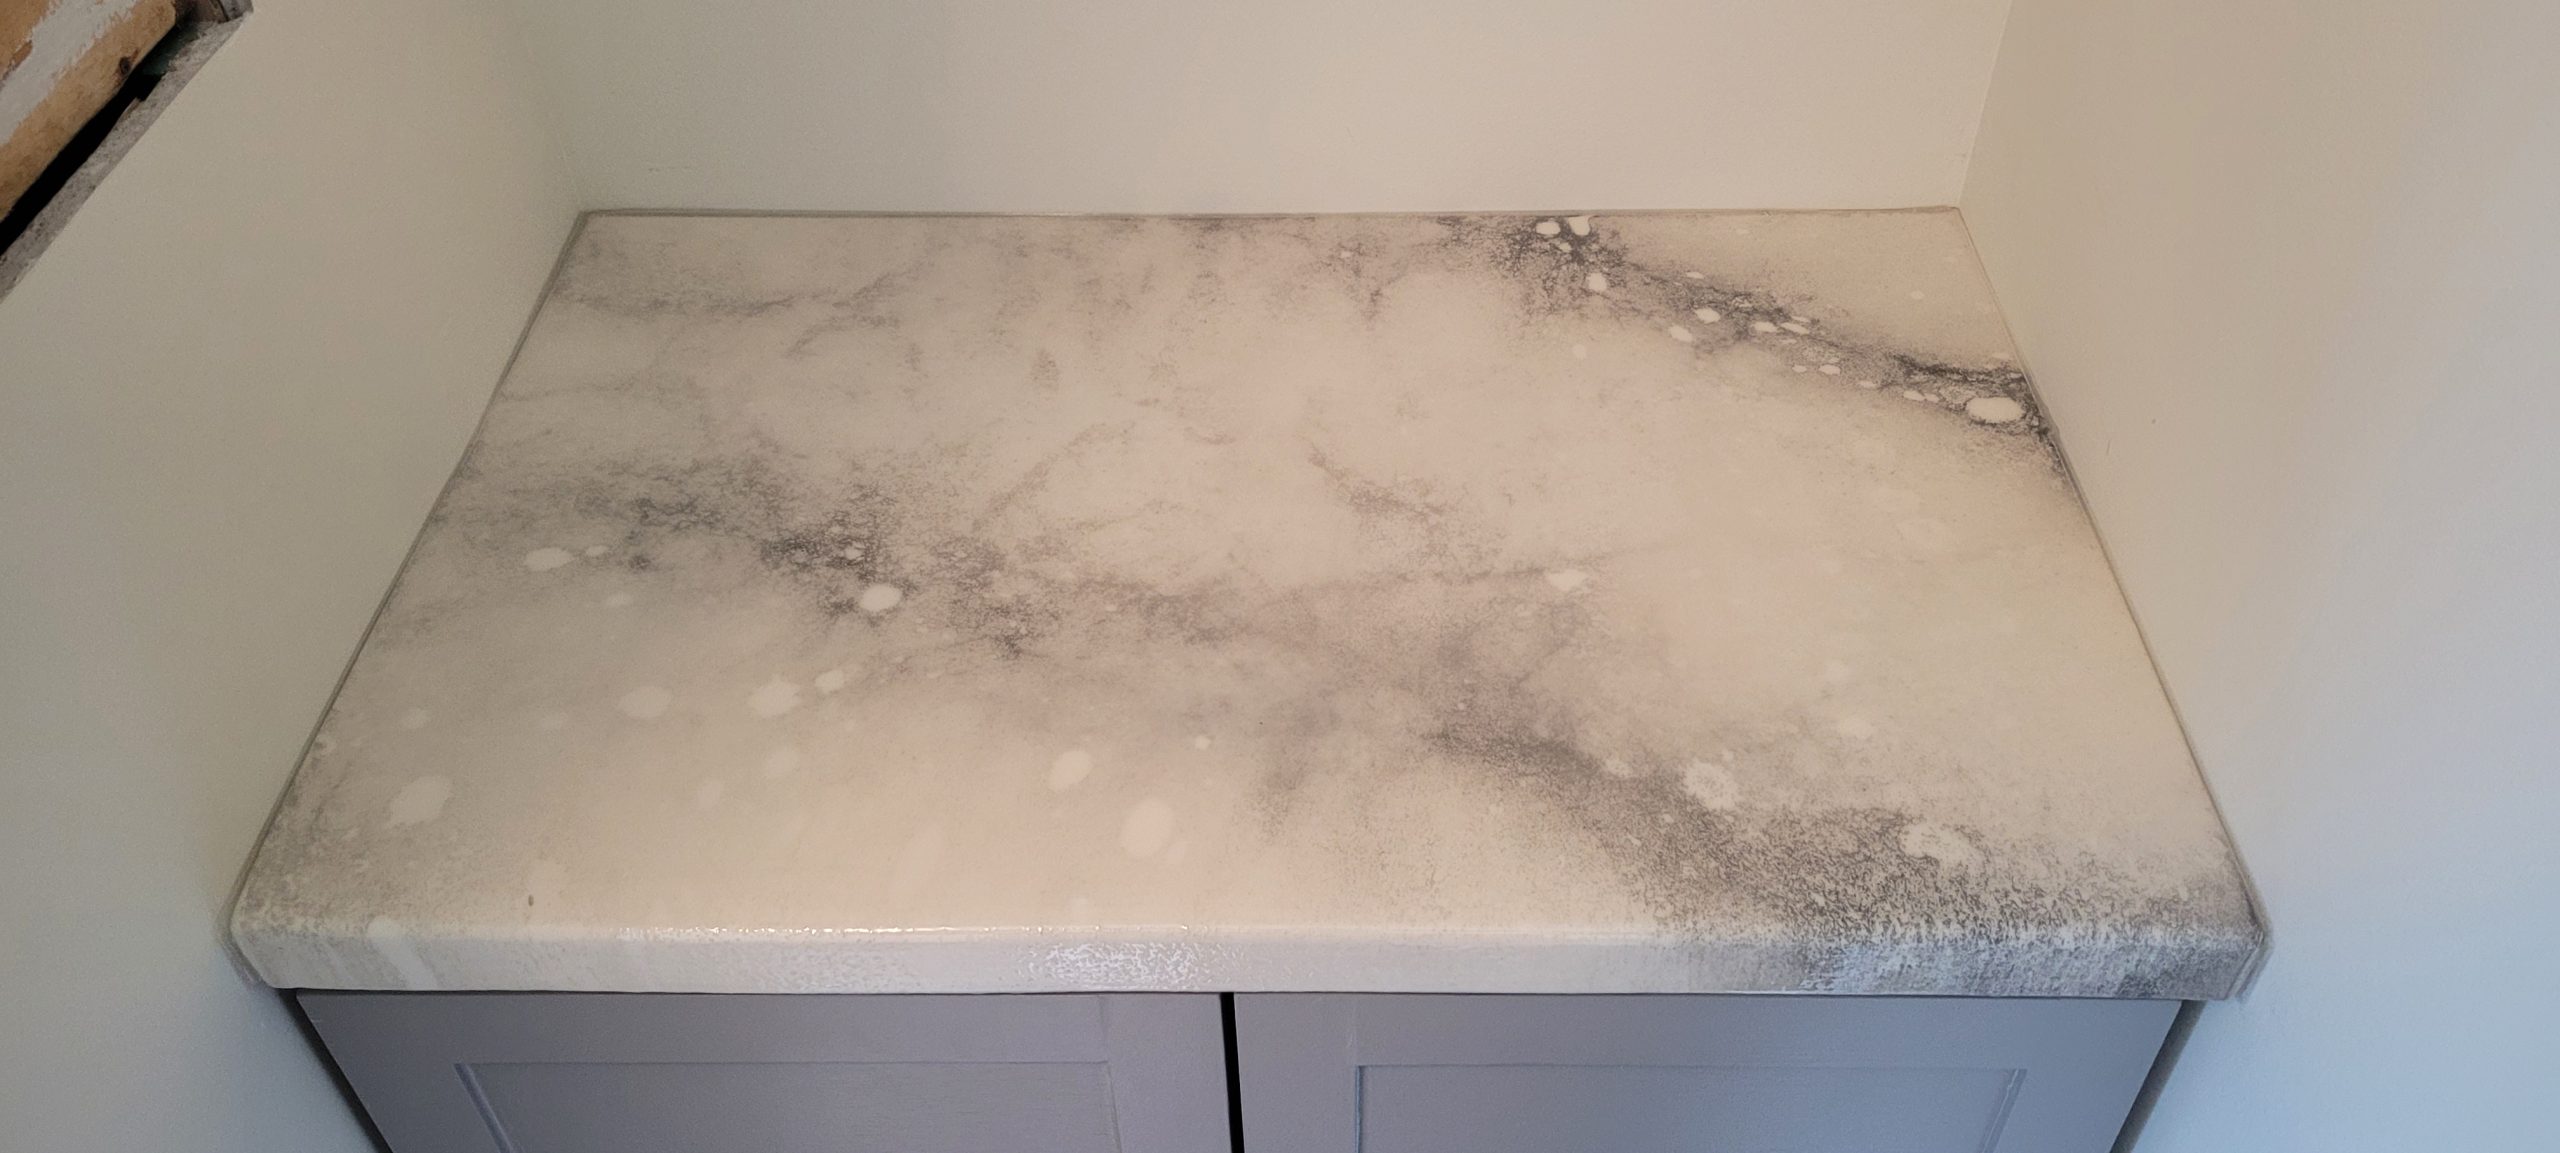
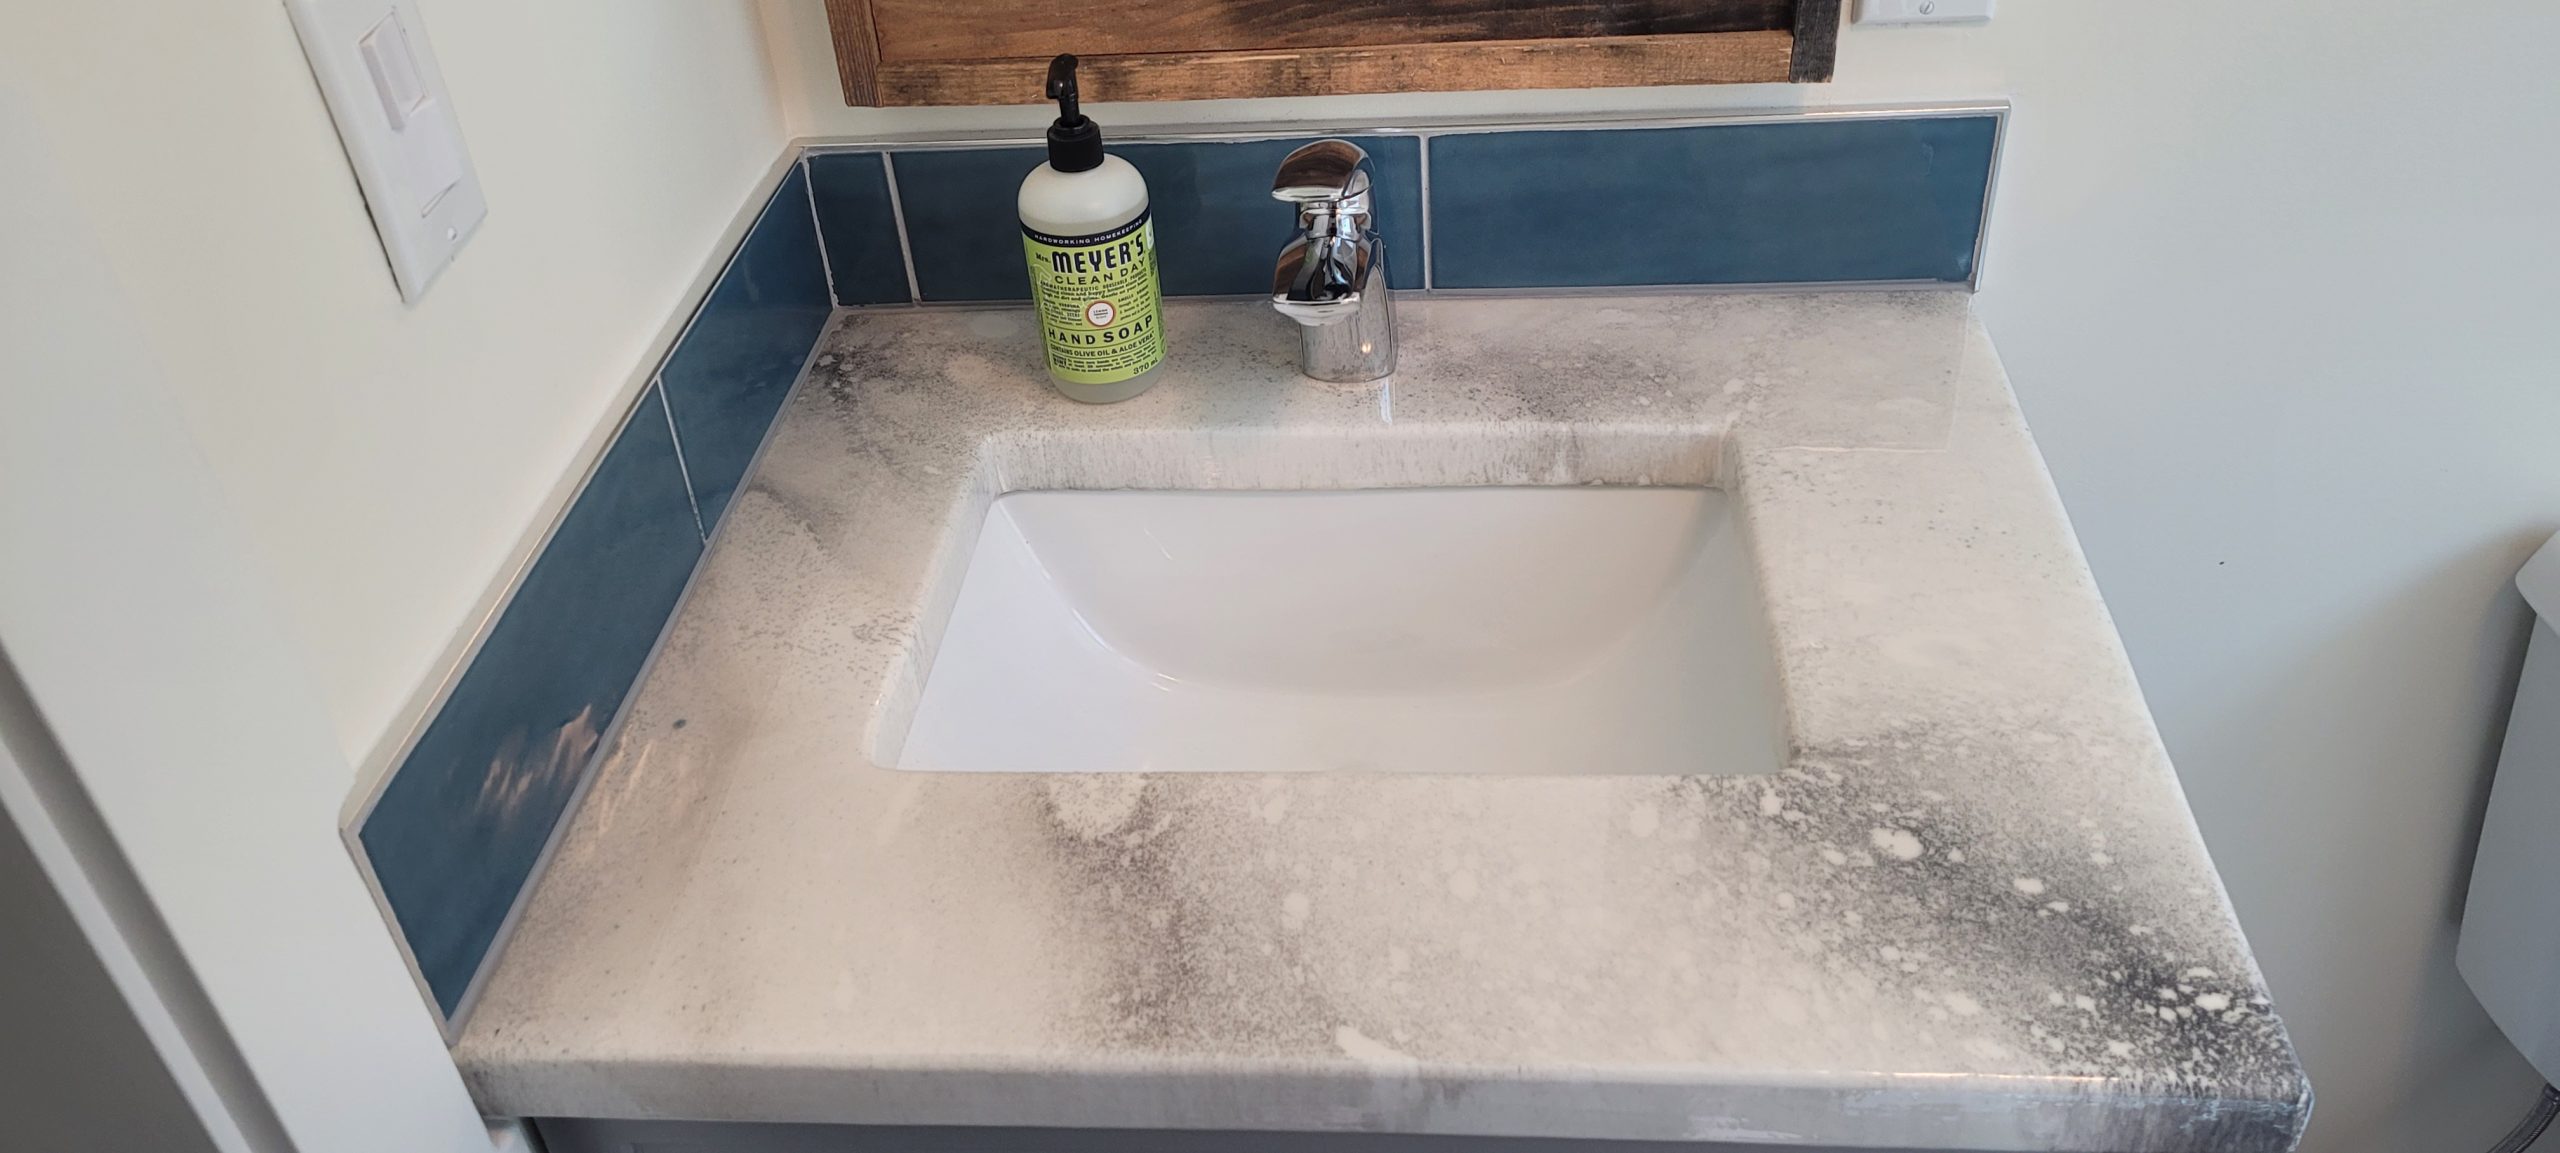
For the grey countertop I made, I held the spray paint about 2 feet above the countertop at a 45 degree angle and kind of misted the countertop in a specific direction to mimic the appearance of a vein of color. Then I took a spray bottle filled with 90% Isopropyl alcohol and followed the same misting process.
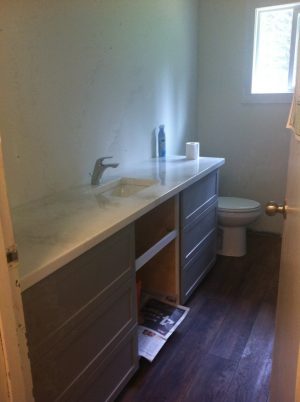
Spraying the alcohol on top of the paint will make the paint pull away from the alcohol and give it a granular effect.

If you do spritz some of the alcohol on top, go easy on the heat as it can ignite if you leave the heat in one place for too long 🙂
As I mentioned before, the epoxy will move on it’s own as it dries, but adding heat to specific areas will move everything around as well.
Just use your little propane torch to slightly warm up a little section and it will move in response to the heat. Make sure you don’t leave the torch in one area for too long or you could burn the epoxy and paint. Move it around a little and keep it about 1/2″-1″ off the epoxy.
This is where practicing with a test piece can come in handy so you get a feel for how the epoxy moves.
When you’re happy with your design, you want to lightly run the propane torch over top of the entire countertops in case there are any bubbles that still need to the surface and pop. This will leave you with a nice smooth surface.
Go easy with the heat around the edges of your counter or you may find the epoxy spilling excessively over the edge of it.
Once you’re happy with it, make sure you take the time to give everything a good look to make sure you don’t have any paintbrush bristles, bugs or major flaws in your epoxy.
Every once in a while, go ahead and use the paint brush to even out the edges of the countertops where the epoxy has dripped over to make sure you have a nice even coat.
I ran the brush underneath the countertop edges to take care of any major drips a few times during the first few hours that the epoxy is setting.
After that, all you need to do is wait about 24 hours or so (see the directions for your specific epoxy) before you do the final clear coat.
After about 24 hours or so, your base/artistic coat should be dry. At that point, you’re halfway to finishing your countertops.
Before you lay down your next coat, you’ll want to sand flat the little drips around the edges – either by hand or using a palm sander – so there’s a nice smooth edge underneath the countertop.
Then you need to give the epoxy a light sand by hand with some fine grit sandpaper (I used some 100 grit) just to help the new layer of epoxy bond with the first layer…just like with the primer.
Brush & wipe off the dust from the countertops after sanding and then you’ll be ready to mix up your final clear coat.
When doing the clear coat, you follow the same process as you did with the epoxy before but this time you don’t add any paint.
Clean up the edges as before and you should have a fabulous looking countertop ready to go!
The Conclusion of your DIY Epoxy Countertops
Sometimes when you read the steps and instructions in a tutorial they can seem overwhelming, but the process is really quite easy.
Take your time, plan ahead and do a couple small practice samples maybe 12″x12″ and you’ll have the hang of it in no time.
I’d say the most critical part is getting your measurements correct when you’re making the countertop if you’re cutting holes for the sink & faucet.
Other than that, the DIY epoxy countertops are really quite simple to do and the results are great!